So I propose a Thanksgiving round-up of extra-delicious holiday fare!
I'll start with two recipes of mostly-my-own-devising.
I outdid myself this Thanksgiving. Okay, so I've still never made an entire Thanksgiving dinner myself, but I'm getting there. And that turkey would have been less tasty if I hadn't pointed out that herbs and spices are good things to use on it. Herbs, spices, and butter. Lots of butter. (According to my sources, it doesn't actually soak into the flesh that much, so fear not. Though what are you doing being shy about butter on Thanksgiving anyway.)
Delicious number 1:
I love stuffing. My family does not. This was a problem for many years. It was hard enough to talk them into putting stuffing on the table at all, let alone taking the time and effort to make it from anything but Stovetop. (Or Trader Joe's, also made on the stovetop.)
This year I took matters into my own hands. I made cornbread stuffing from scratch. I contemplated using Trader Joe's cornbread mix, which is delicious beyond all reason and frankly better than most from-scratch cornbreads I've had, but I decided from scratch meant from scratch, the whole hog (so to speak).
Also, making your own stuffing means you are free to leave those icky celery bits out. Um. Unless you actually like celery. I sure don't.
I pretty much threw stuff in as suited me. I had the kielbasa and the cornbread, but when I was mixing it together I realized it was basically crumbly cornbread with teeny bits of sausage and onion thrown in, and it didn't yet feel like its own dish. So I chopped up an apple and threw that in at the very last minute.
Results were stupendous. My stuffing-hating family demolished it. My dreams of leftovers were dashed. Next time I'm gonna need a bigger pan.
Michelle's Magical Cornbread Stuffing
serves one if you really love stuffing. If you only moderately love it, serves about 6.
(adapted from...I don't even remember where. Eating Well?)
The first step in making cornbread stuffing is to make the cornbread. Ideally, you want to do this a day in advance.
For the cornbread:
1 1/4 cup stone-ground cornmeal
3/4 cup flour
3 tablespoons sugar
1 teaspoon baking powder
1/2 teaspoon salt
1 1/4 cup buttermilk (or about 1 tablespoon lemon juice or white vinegar plus enough milk to fill a measuring cup to 1 1/4 cups)
2 tablespoons butter, melted
1 large egg
3/4 to 1 cup corn kernels, fresh or frozen
Preheat the oven to 350 degrees F. Grease an 8-inch square pan.
Sift together the flour, cornmeal, sugar, baking powder, and salt.
In a separate bowl, mix the egg, the melted butter, and the buttermilk. Fold in the dry ingredients a little at a time. Add the corn kernels and stir to combine. Do not overmix. Pour batter into the prepared pan and bake 25 to 30 minutes.
For the stuffing:
1 pan prepared cornbread, cubed
6 to 8 oz turkey kielbasa (though chicken and apple sausage would work really well here as well)
2 small onions, finely chopped
1/4 teaspoon salt
Pepper
1/2 teaspoon sage
1/2 teaspoon rosemary
1 2/3 cup chicken broth (more or less as needed)
1 apple, diced (skin on is fine)
Grease a 9 x 13 baking pan. Preheat the oven to 325 degrees F.
Slice the kielbasa or sausage and brown in a skillet together with the onion. You don't need to add oil here. The fat from the sausage is enough. Cook until onion is soft and golden, about 10 minutes. Transfer to a bowl and add the salt, pepper, and herbs. Add in the cornbread and apple and toss. Pour 1 cup of broth over the mixture, and add additional broth as necessary until mixture is sufficiently moistened.
Cover pan with foil and bake 25 minutes. Hide the pan from your friends and loved ones and eat it by yourself.
Delicious number 2:
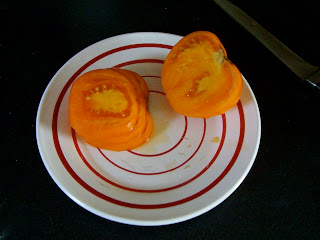
Next up: mashed sweet potatoes! Mashed sweet potatoes have totally taken over regular mashed potatoes in our house. I have some regrets about this, much as I love sweet potatoes. Sometimes, you just need regular potatoes. I don't understand what we're supposed to do with all that gravy without delicious starchy buttery potatoes to pour it over. Still, mashed sweet potatoes are a food of the gods.
I looked everywhere for a good recipe for mashed sweet potatoes, but none of the recipes I saw seemed right. They all called for butter and cream or milk, and lots of sugar. This seems ridiculous to me. Sweet potatoes are indeed sweet. Sweet enough on their own, and heavenly enough without the need to add butter. And yet I didn't quite want to serve them plain. Maybe a smidge of sweetener, not a lot, something that would add a special flavor. Like...maple syrup? Yes please. But not much else. I wanted the sweet-potatoeyness to shine through.
So I made up my own damn recipe.
Michelle's Maple Mashed Sweet Potatoes
serves very few, if you like sweet potatoes...but we'll say 6
6 medium sweet potatoes, scrubbed
1/4 cup maple syrup (approximately)
1/4 cup milk (approximately)
1/2 teaspoon cinnamon
Preheat oven to 400 degrees F.
Prick sweet potatoes with a fork and roast in the oven for about an hour, until tender.
Peel the skins (they should come right off, but try not to burn your fingers. Or be sensible and let them cool first). Toss flesh into a pot and mash. Add the maple syrup and milk, but don't go overboard. You want just a hint of maple here, and just enough milk to help thin the mixture out and give it a good consistency. Add the cinnamon. Maybe a pinch of salt, too, if you're feeling adventurous.
Serve. If you have the willpower, save some and make sweet potato biscuits with the leftovers. (Make biscuits, but only use 2 tablespoons of butter and sub the rest for 3/4 cup mashed sweet potato. Bake.)


